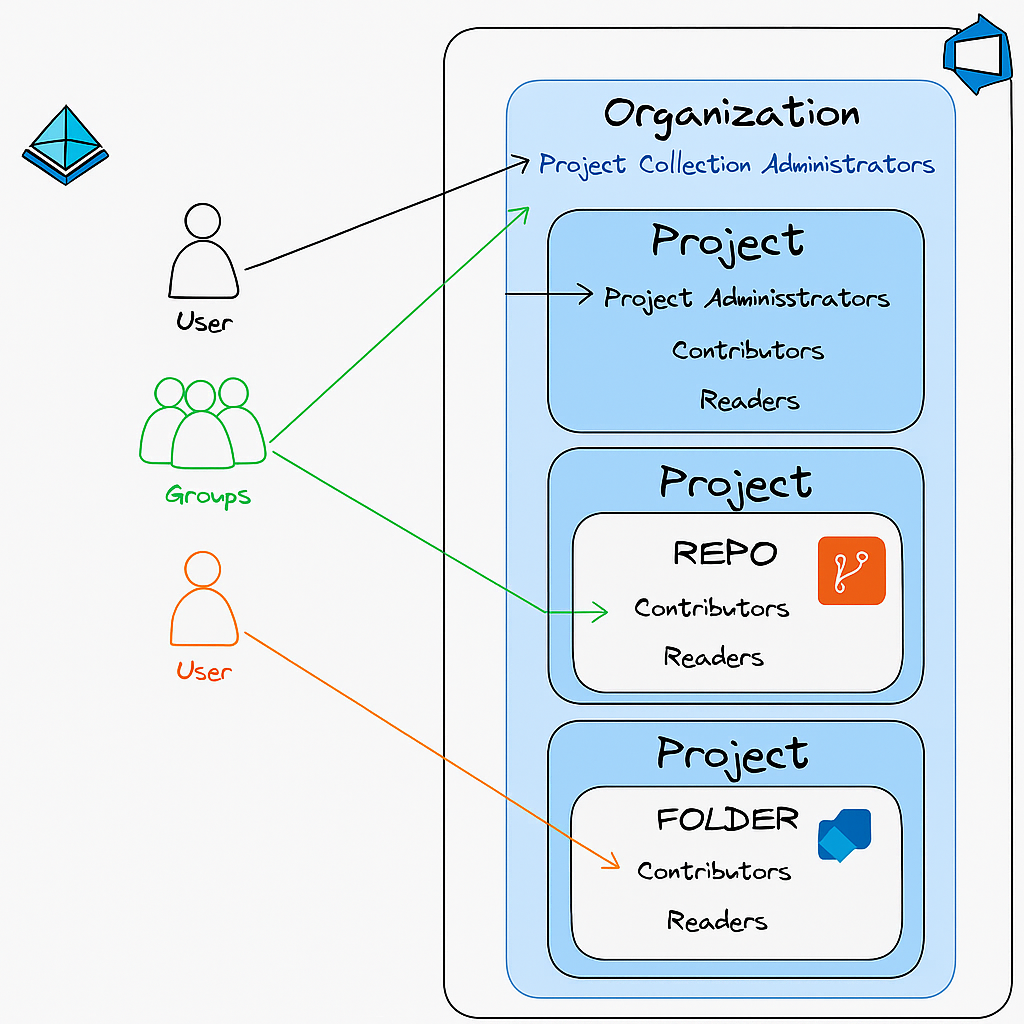
In Azure DevOps, permissions are handled through security groups. These groups determine what actions users can perform.
Common Group Types
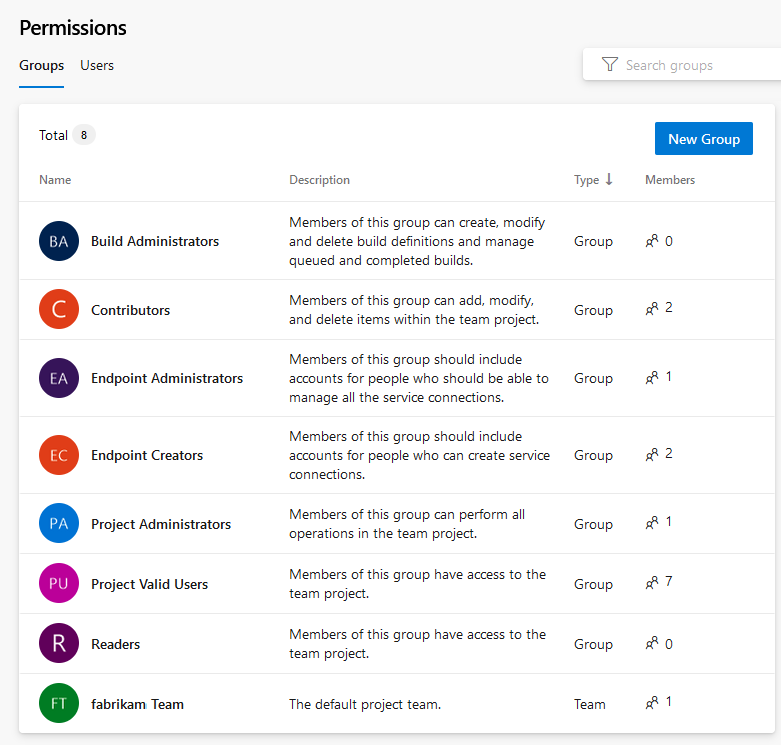
Predefined groups – such as Readers, Contributors, Project Administrators, or Project Collection Administrators.
Custom groups – which you can create and configure with specific permissions.
Permission Levels
Permissions can be scoped at different levels:
Organization level – e.g., Project Collection Administrators
Project level – Readers, Contributors, Project Administrators
Repository or Branch level – fine-grained control for code access
Pipeline or Folder level – control over build and release definitions
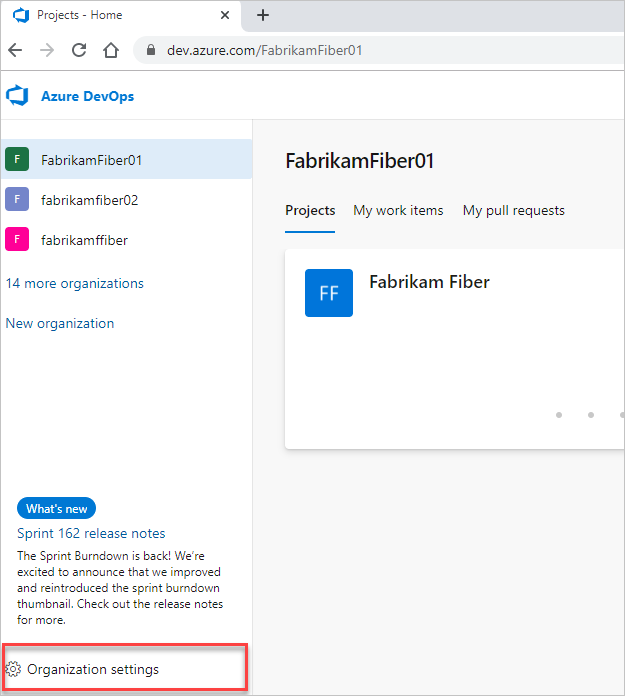
At the top layer, you manage access through Organization Settings.
Steps to Assign Organization-Level Roles:
Go to Organization Settings.
Open Permissions.

Assign users to groups such as:
Project Collection Administrators – full control across all projects
Readers / Contributors – limited but scoped access
👉 Best Practice: Use Project Collection Administrator roles sparingly. Reserve them for trusted administrators only.
Each project comes with three main roles:
- Reader: View almost everything (code, work items, pipelines) but cannot modify
- Contributor: Create and edit code, work items, and pipelines
- Project Administrator: Full access to project settings and resources
Steps to Configure:
Navigate to Project Settings.
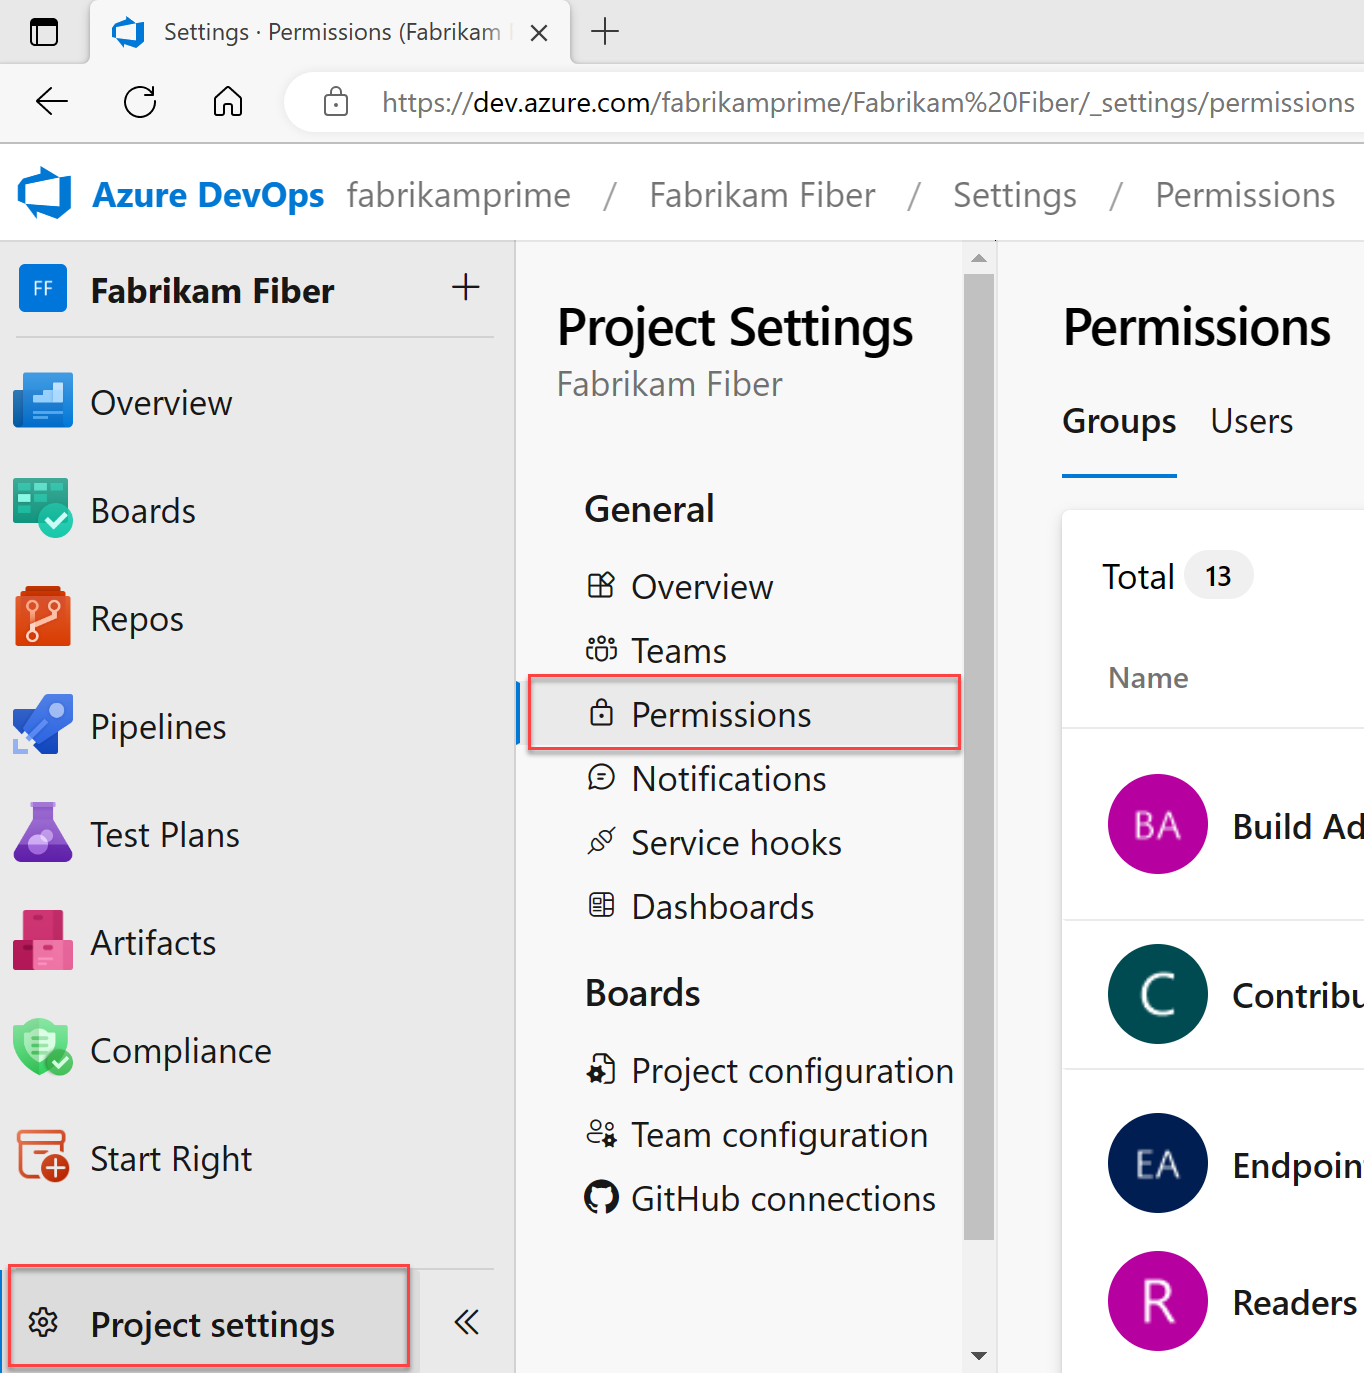
Select Permissions.
[Project-level roles overview]Add users or groups and assign the appropriate role.

👉 Pro tip: Start everyone as Readers and grant additional access (e.g., Contributor) only where needed.
Sometimes default roles aren’t enough. That’s where custom groups shine.
How to Create a Custom Group
Go to Project Settings > Permissions.
Click New Group.
Define the group name and description.
Assign custom permissions (e.g., repo access but no pipeline edit rights).
Add members.
This allows you to tailor security precisely to your workflow.
For more granular control, Azure DevOps lets you set permissions at the repository or branch level.
Repository Permissions
# Example: Restrict repo access
User: dev1@example.com
Permission: Contribute
Scope: Repo – PaymentService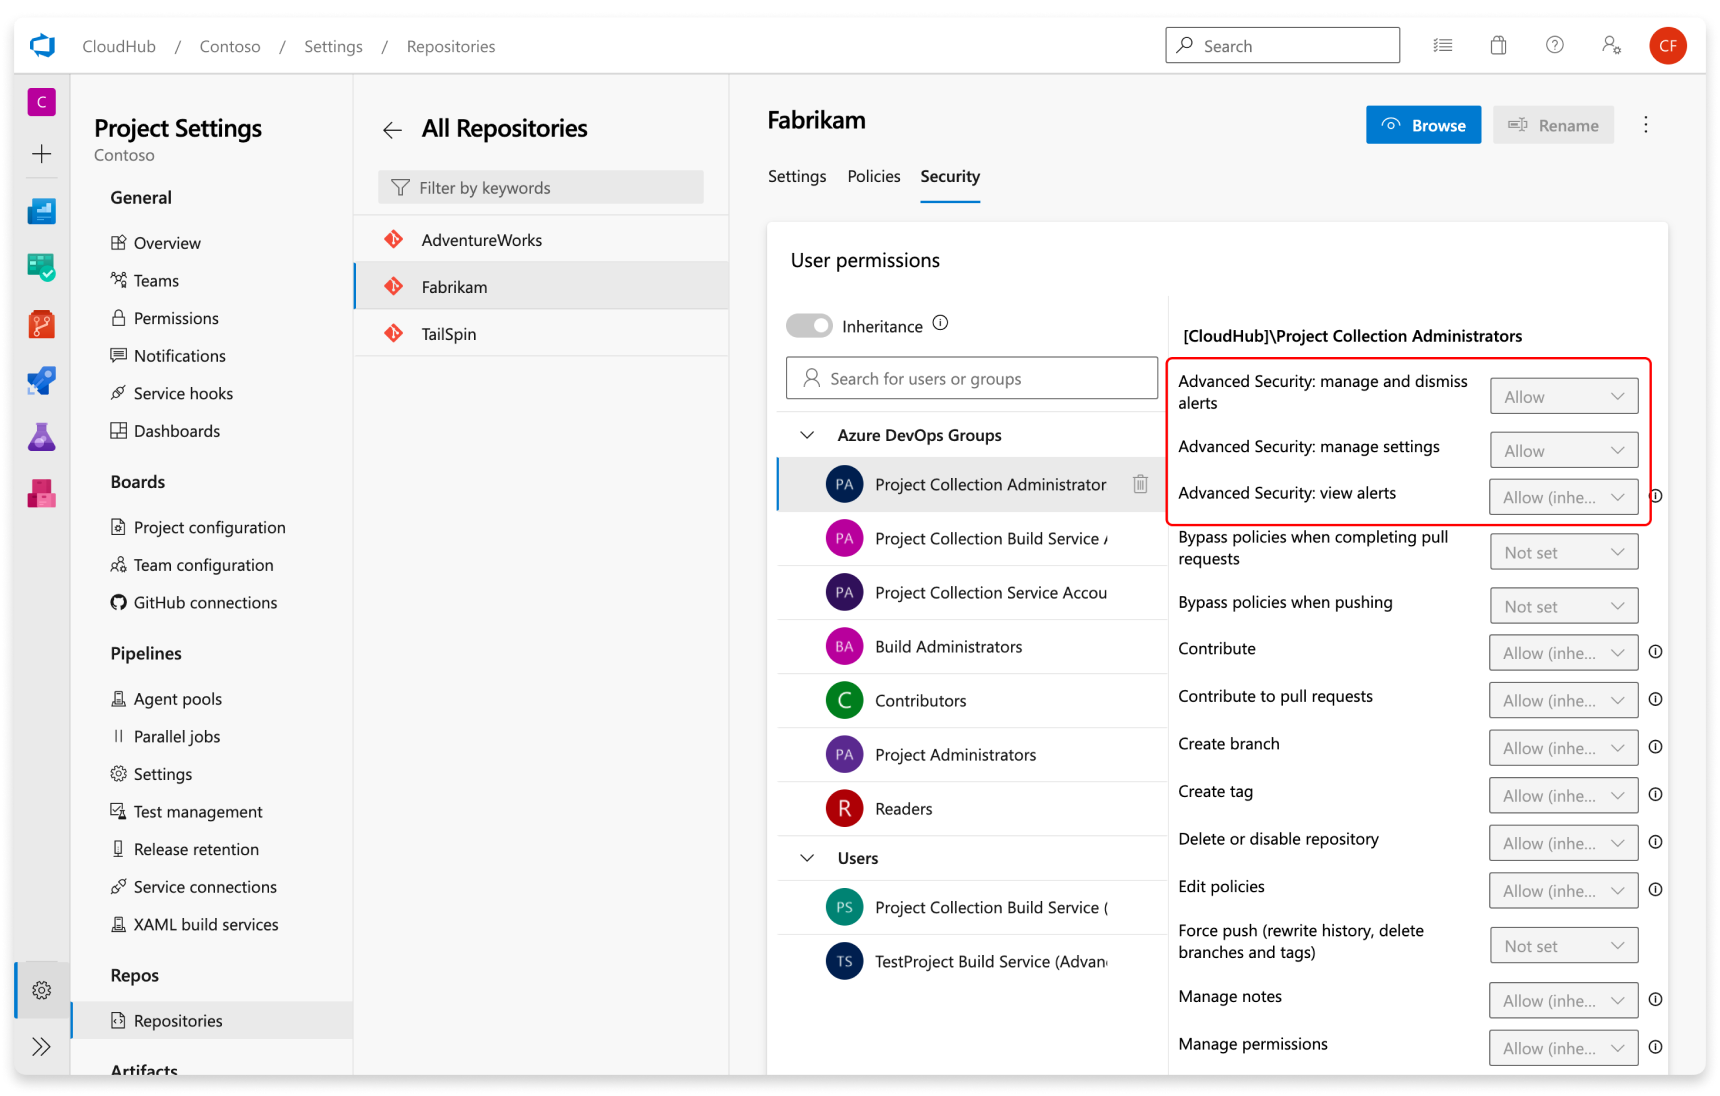
Branch Permissions
Select a repository and open the branch you want to secure.
Go to Security.
Assign roles (e.g., restrict direct pushes to
main).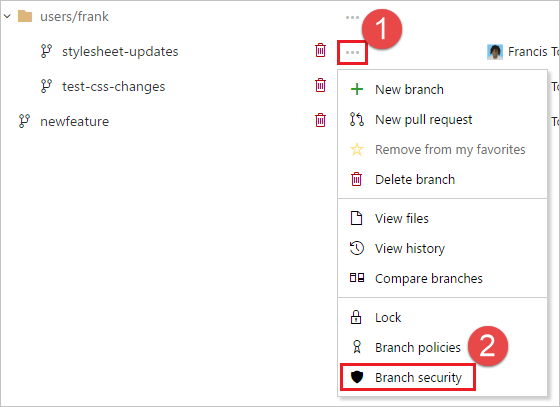
Pipelines can also be organized into folders, making it easier to manage permissions.
Steps:
Go to Pipelines.
Organize pipelines into folders.
Open Folder Settings > Manage Security.

Add users or groups and assign permissions (e.g., who can run or edit pipelines).
This is especially useful for large organizations with multiple teams.